One of the greatest contributions of CNC machining to the process of manufacturing is its capability to produce parts with a level of precision and automation. Creating efficient and accurate toolpaths is definitely one of the most important procedures in CNC machining. Fusion 360, a widely used CAD/CAM software, is pretty much taking the hassle away from this process, even for those who have no prior knowledge. The present guide charts a course through Fusion 360 toolpath creation for CNC machining in 2026; thus, it embodies a step-by-step guide, tips, and best practices.
What is a Fusion 360 Toolpath
A tool path in Fusion 360 is basically the code that guides the CNC machine on how to move the tool, cutting the workpiece. The toolpaths define the movements, speeds, depths, and other such things, ensuring precision and efficiency. Understanding different types of toolpaths in Fusion 360 is a must-have knowledge for successful CNC machining.
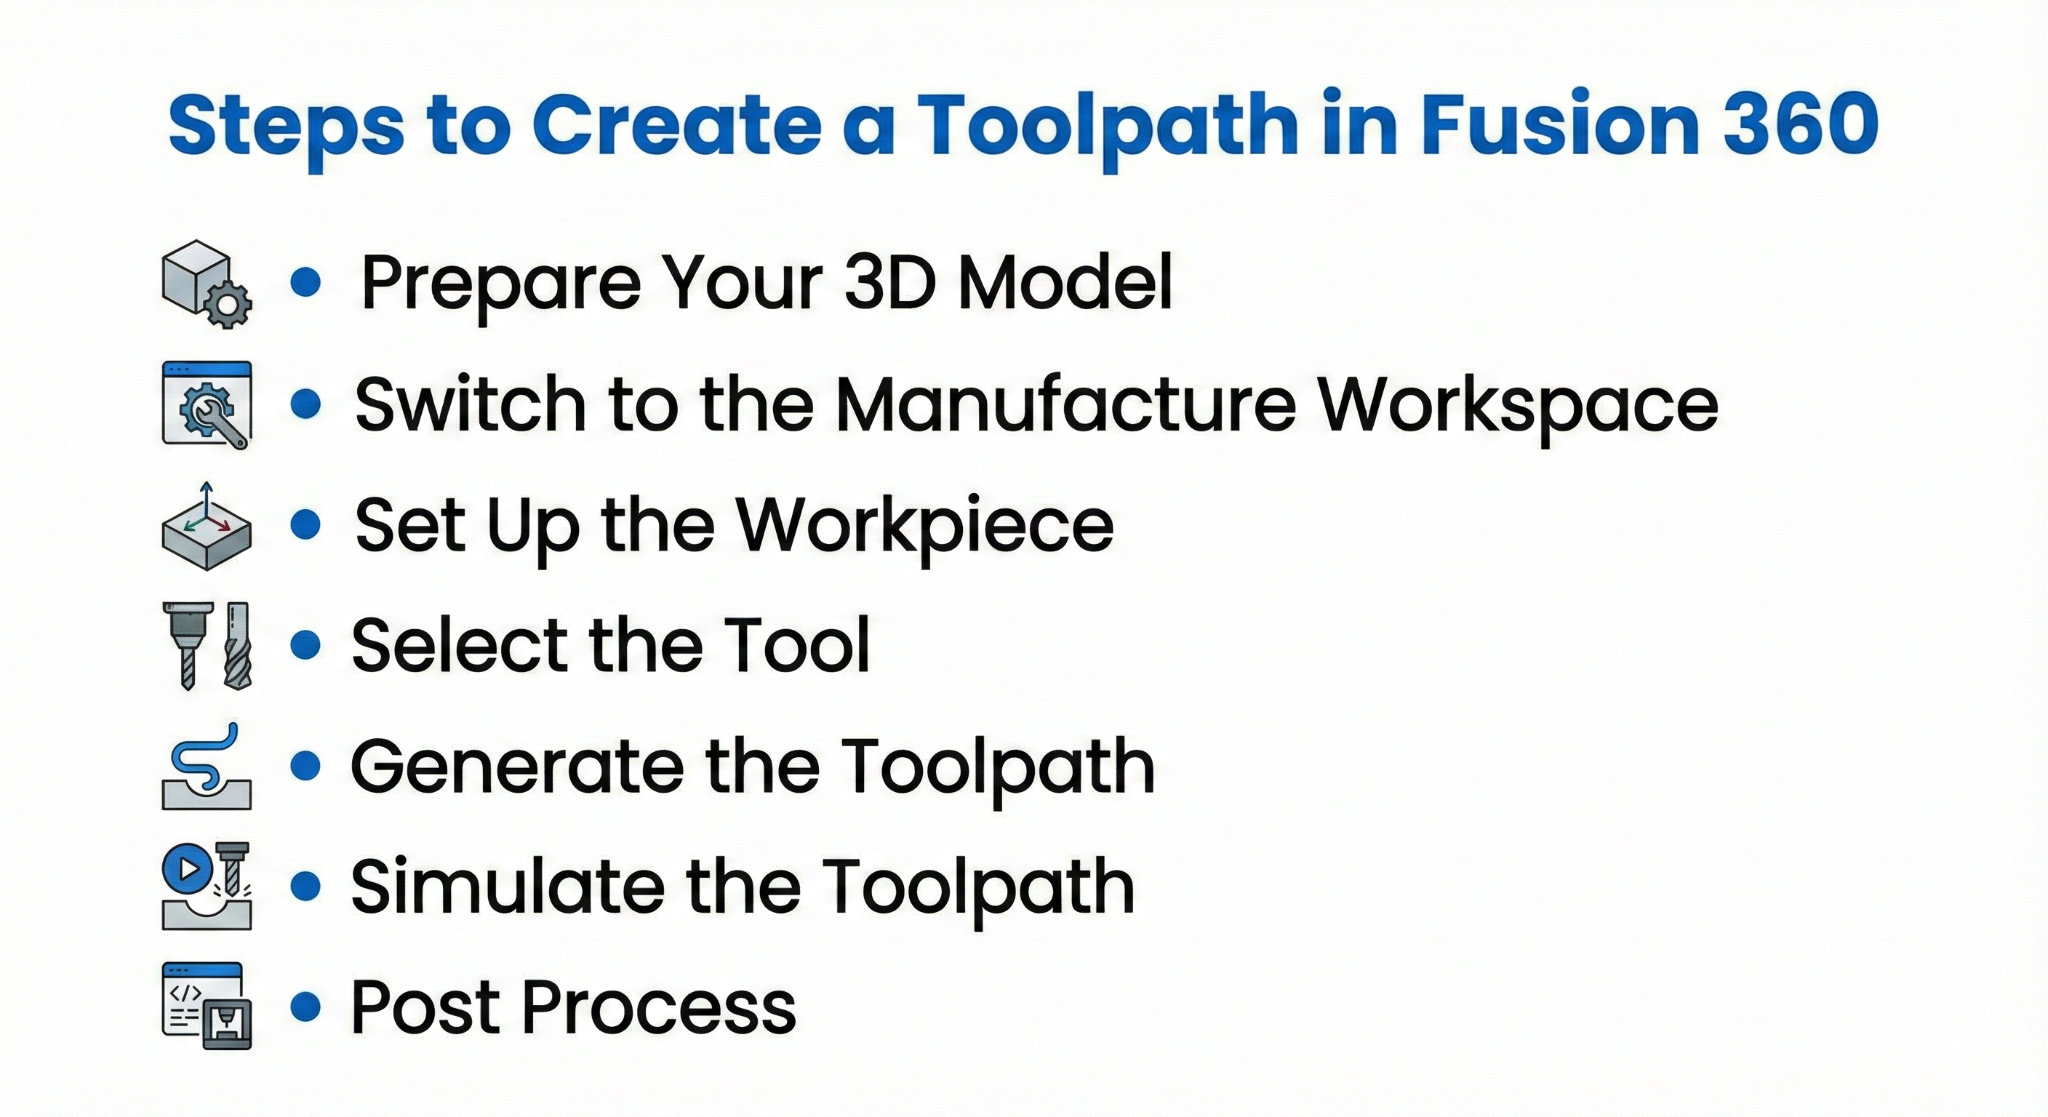
Steps to Create a Toolpath in Fusion 360
Here is a step-by-step procedure for CNC project toolpath creation in Fusion 360:
1. Prepare Your 3D Model
- Import a 3D model, or you can go ahead and design a new one in Fusion 360.
- Make sure your model is fully constrained and accurately sized.
- Be careful if there are any overhangs or places that may need some special work for the machining
2. Switch to the Manufacture Workspace
- Simply hit the button “Manufacture” in Fusion 360.
- Choose the kind of machine (Milling, Turning, or 3D Printer) that you are going to use
3. Set Up the Workpiece
- Provide the dimensions and the shape of the stock material
- Make the toolpath’s origin point clear. Most of the time, the top-left corner or the center of the stock is where the origin is set.
- Select the work coordinate system (WCS) for the machine.
4. Select the Tool
- Use the material and the machining strategy that you have in mind to come up with the correct tool for the job (e.g., end mill, ball nose, or drill).
- Put the tool details, such as the diameter, number of flutes, feed rate, and spindle speed, into the tool.
5. Generate the Toolpath
Fusion 360 enables users to create a tool path in various ways.
| Tool Path Type | Use Case | Benefits |
|---|---|---|
| 2D Contour | Cutting edges and profiles | Precise edge finishing |
| 2D Pocket | Cutting the interior of any general outline | Quick material removal |
| 3D Adaptive | Complex 3D surfaces | Reduces machining time |
| Drilling | Holes and boring | Efficient repetitive drilling |
- Click the “Setup” button and choose “2D”, “3D”, or “Drilling” according to your model.
- Change the machining parameters such as the step-over, step-down, and machining direction.
6. Simulate the Toolpath
- Employ Fusion 360 simulation to check the correctness of the operation.
- Look for collision, overcuts, or tool gouging.
- If there are any errors, modify the parameters to avoid them during the actual machining.
7. Post Process
- When the work is perfected, the Post Process option of Fusion 360 may be employed to emit the G-code for your CNC device.
- Choose the machine type and the post-processor that are compatible with your CNC controller.
- Write down the G-code and bring it to your CNC machine for machining.
Tips for Optimizing Fusion 360 Toolpaths
- Before finishing passes, it is always a good idea to perform a roughing pass in order to save time and reduce the wear of the tool.
- For big material removals, it is better to rely on adaptive clearing as it is faster and smoother than conventional pocketing.
- Make sure to keep your tools sharp and select the correct feeds and speeds in order to prevent deflection.
- Do not forget to regularly update Fusion 360 in order to benefit from the latest toolpath algorithms and simulation improvements.
Benefits of Using Fusion 360 Toolpaths
- Efficiency: Time-consuming manual programming is automated by toolpaths.
- Precision: The high accuracy leads to minimal errors and better part quality.
- Flexibility: Provides support for 2D, 3D, and multi-axis machining.
- Pre-visualization: A visual check before executing the task leads to less waste.
FAQs
Q1: Is it easy for beginners to use Fusion 360 toolpaths?
Yes, Fusion 360 provides a simple-to-understand interface with step-by-step toolpath creation, so it is accessible for beginners and hobbyists.
Q2: How do I choose the right toolpath type?
The shape of your part determines the answer. Employ 2D toolpaths for straightforward forms, 3D adaptive for intricate surfaces, and drilling for holes.
Q3: Is it possible to simulate multiple toolpaths at the same time in Fusion 360?
Indeed, Fusion 360 enables you to simulate the whole machining sequence for collision detection and efficiency checking prior to the real machining.
Contact Us
📞 +91 99137 89065