⬛ 2D Pocket Guide — WinFusion 2025
2D Pocket in WinFusion —
Fast & Reliable CNC Milling Toolpath! ⬛
Pocket Cavity | Ramp Entry | Multiple Depths | Stepover | Finishing Pass | Simulation
Multiple Depth Cutting — Z Levels:
Pass 1 ↓
Pass 2 ↓
Pass 3 ↓
Final Depth ⭐
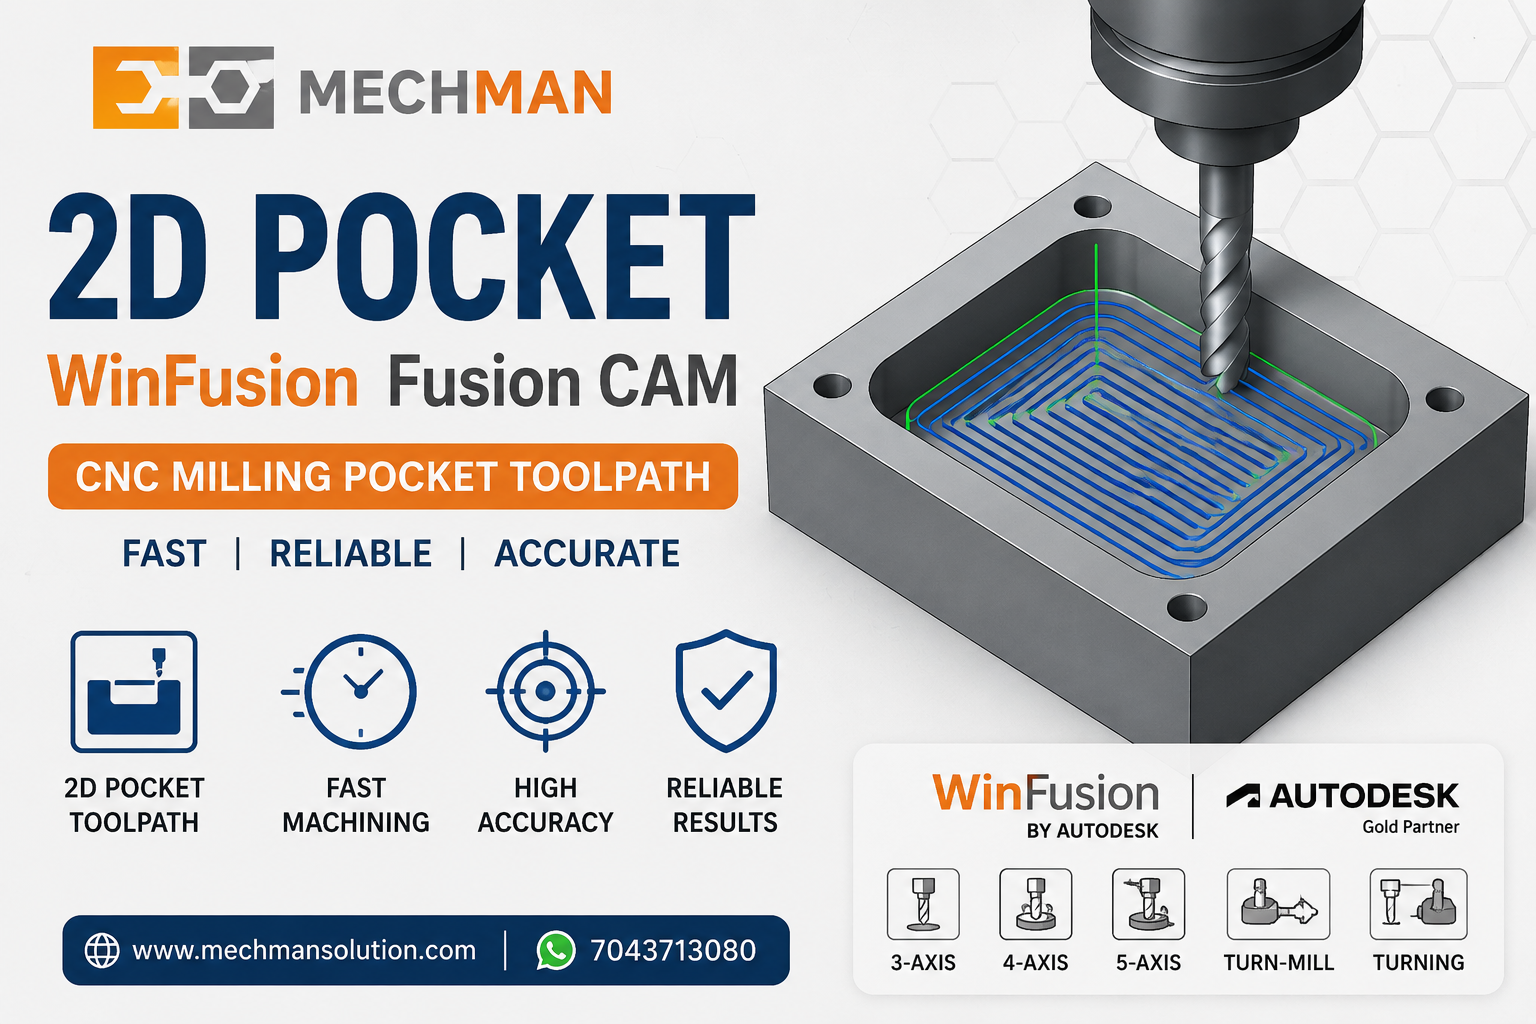
2D Pocket = Component ke andar closed area ka material efficiently remove karna. Plate cavity, die recess, fixture pocket, internal slots — sabse commonly used 3-Axis CAM operation! WinFusion mein fast aur reliable!
CNC milling mein bahut baar hume component ke andar ka material remove karke ek pocket, cavity ya recessed area banana hota hai. Aise operations ke liye WinFusion mein 2D Pocket toolpath ek simple, fast aur highly useful strategy hai!
2D Pocket ka main purpose: Selected closed area ke andar se material efficiently remove karna — pocket ki boundary aur required depth properly control mein rakha jata hai!
WinFusion workflow: CAD Model → Stock → WCS → Tool Library → 2D Pocket → Simulation → Proven Post → NC Code → CNC Machine! ✅
⬛ 2D Pocket Kya Hota Hai?
Simple Explanation: Closed area ke andar specified depth tak material remove karna = 2D Pocket!
⬛
Rectangular Pocket
Plate cavity, die recess
⭕
Circular Pocket
Round cavity, boss recess
🔷
Irregular Pocket ⭐
Complex closed shape
Plate ke andar rectangular cavity ✅
Die plate me recess ⭐
Fixture pocket ✅
Internal slot-type area ⭐
Multiple pockets ek operation ✅
Simple 3-Axis VMC jobs mein ye sabse commonly used CAM operations mein se ek hai! ✅
📋 2D Pocket Setup — 8 Steps Mein
WinFusion Mein 2D Pocket Setup — Correct Process:
1
Tool Select Karo
Flat End Mill — correct size
2
Pocket Boundary Select
Closed geometry select karo
3
Heights Define Karo ⭐
Top → Bottom depth set
4
Multiple Depths Set ⭐
Stepdown per pass define
5
Stepover Set Karo
Side cutting width decide
6
Entry Method Select ⭐
Ramp / Helical / Pre-drill
7
Stock to Leave Define
Roughing allowance set
8
Simulation Run Karo ⭐
Verify before NC generate!
🔑 3 Most Important Parameters — Ye Samajho!
📏
Multiple Depths / Stepdown — Tool Life Protect Karo! ⭐
Deep pocket ko ek hi pass mein machine mat karo!
❌ Full Depth Ek Pass:
- Excessive tool load
- Tool breakage risk
- Machine spindle overload
- Poor surface finish ⚠️
✅ Multiple Stepdown:
Depth 12mm ÷ Step 3mm= 4 passes ⭐
Tool load reduce✅
Better finish✅
↘️
Ramp / Helical Entry — Smooth Material Enter! ⭐
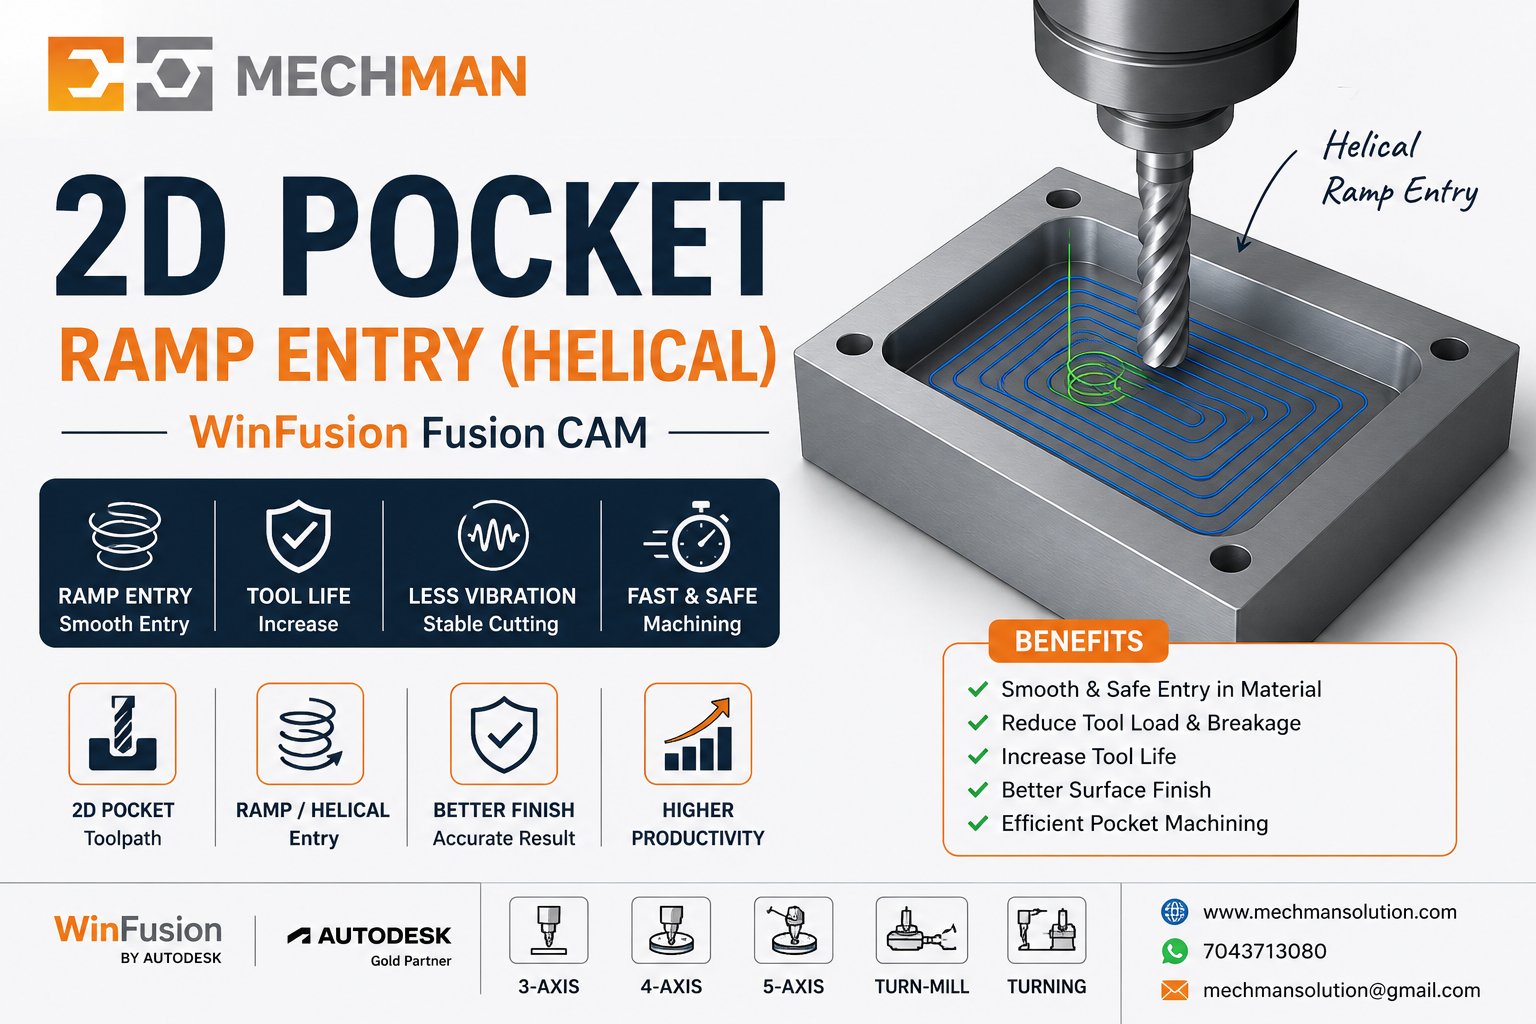
Ramp ya Helical entry = Tool gradually material mein enter karta hai — sudden plunge se better! Tool load reduce, entry smooth, life improve!
❌ Direct Plunge:
Tool suddenly full depth mein enter → Load spike → Tool damage risk!
✅ Ramp Entry:
Gradually angle se enter → Smooth load → Tool life better ⭐
↔️
Stepover — Sahi Balance Maintain Karo!
❌ Too High
Cutting load increase → Tool stress → Poor finish
✅ Correct ⭐
Balanced load → Good finish → Optimal time
❌ Too Low
Unnecessary passes → Cycle time increase!
Correct stepover = Tool diameter + Machine capability + Material ke according decide karo! ✅
📐 Heights Setting — Tool Ki Journey Define Karo!
Heights = Tool kitni height se start karega aur kitni depth tak jayega — carefully set karo!
C
Clearance Height
Tool agar machine agar move kare toh safest position
R
Retract Height
Tool passes ke beech retract position
F
Feed Height
Jahan se feed rate start hogi
T
Top Height
Pocket ki top face level
B
Bottom Height ⭐ — Most Important!
Final pocket depth — galat hoga to pocket shallow ya overcut hoga!
Bottom Height = Pocket ki Final Depth — Sabse carefully define karo! ✅
🔩
Tool Selection — Important!
Flat End Mill generally use hota hai:
→Tool diameter vs pocket corner radius
→Flute length vs pocket depth ⭐
→Holder size vs clearance
→Material type decide
⚠️ Bada tool = corners tak nahi pahunchega! ✅
Roughing ke baad finishing pass:
Stock to Leave: 0.2 mm
Roughing → Wall + Bottom extra material → Finishing pass → Final size ⭐
Better accuracy + Surface finish! ✅
🎮
Simulation — NC Generate Karne Se Pehle! ⭐
Verify karo — machine pe prove-out time reduce karo!
Always Run!
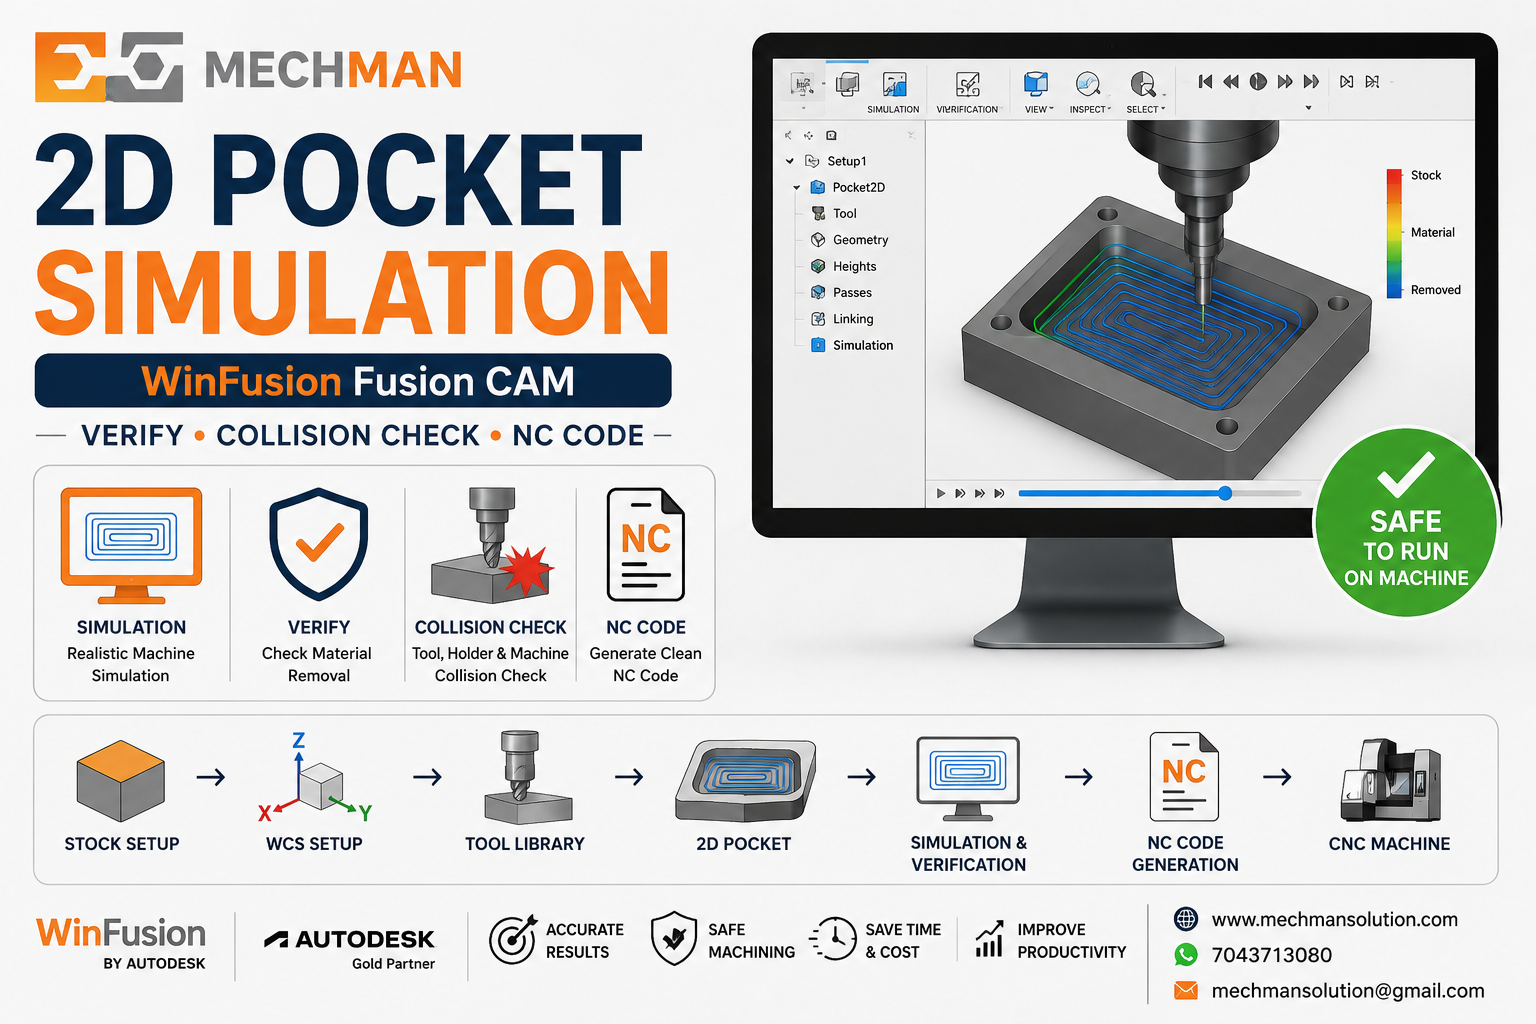
Simulation mein verify karo — pocket complete machine ho raha hai, holder collision nahi, tool safe movement, depth correct — sab check karo pehle!
✓Pocket complete machine ho raha ⭐
✓Tool unwanted area mein nahi
✓Holder collision risk nahi ⭐
✓Pocket depth correct
✓Excess material remaining check
⭐Prove-out time reduce!
🏭 2D Pocket Kahan Use Hota Hai?
✅Fixture Plates
✅Machine Components
✅Automotive Parts
✅Mould Plates ⭐
✅Die Components
✅Jigs & Fixtures ⭐
✅Engineering Components
⭐Production CNC Jobs!
WinFusion — Complete 2D Pocket Workflow 🚀
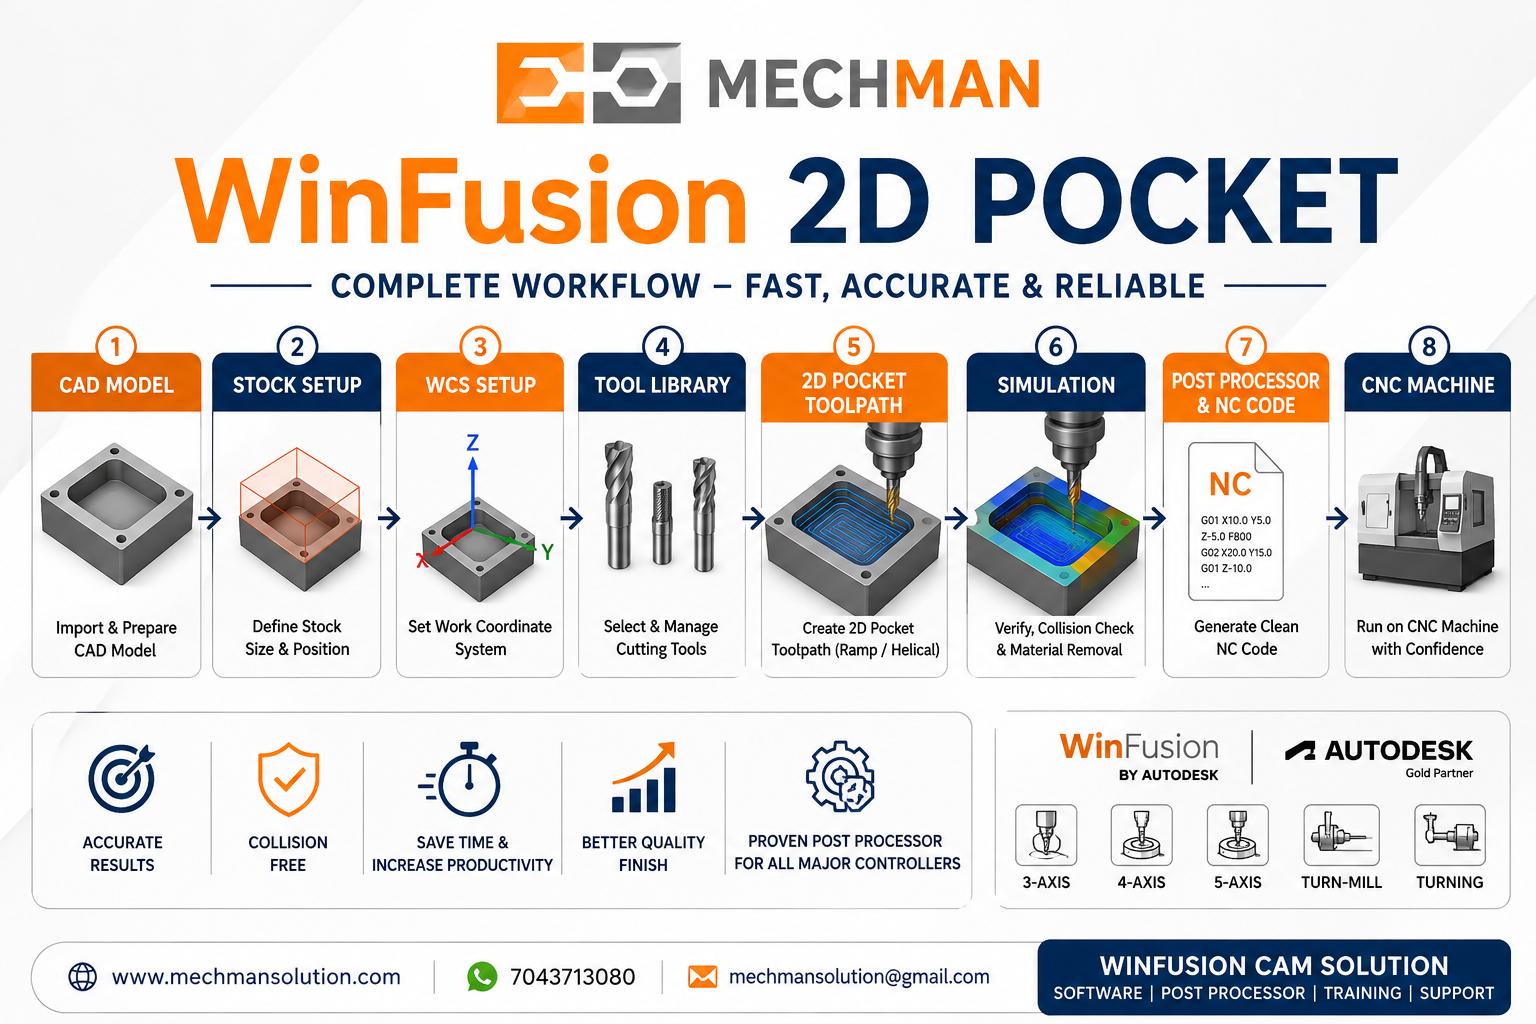
WinFusion workflow: 2D Pocket sirf toolpath nahi — complete process: Tool Library + Simulation + Proven Post + NC Code. Programming standardize karo, shop-floor editing minimize karo!
2D Pocket — Correctly Use Karo! ⬛
Correct tool + geometry + stepdown + stepover + ramp entry + simulation = Fast, Reliable aur Repeatable CNC Pocket Machining!
Stepdown ✅
Tool Life Protect!
Ramp Entry ✅
Smooth Machining!
Simulation ✅
Safe Production!
WinFusion: 2D Pocket → 3D Milling → Turning → 5-Axis → Turn-Mill — complete CNC programming sikhao! Professional CAM → Production! 🚀
⬛
2D Pocket | CAM Training | Post Processor | Simulation
Mechman Solutions — WinFusion
Autodesk Authorized Partner | Vadodara, Gujarat | Since 2015
www.mechmansolution.com
© 2025 Mechman Solutions | WinFusion — 2D Pocket CAM Guide | Vadodara, Gujarat